
Before Installation: Safety First
- Turn off the circuit breaker before starting.
- Verify that backup batteries are installed correctly in the fixture.
- Use appropriate voltage (120V or 277V AC) and follow wiring labels.
 Improper installation may damage the transformer or circuit board. Always double-check voltage requirements and wiring connections.
Before you begin installation, safety should always come first. While emergency lights and exit signs are designed to be user-friendly, they still connect to live building power and must be handled carefully. Start by shutting off power at the circuit breaker to eliminate the risk of electric shock. Double-check that your workspace is dry, well-lit, and free of clutter before opening any wiring compartments. Always follow the manufacturer’s label for voltage requirements (usually 120V or 277V) and confirm that your backup battery is properly installed inside the unit before wiring begins. If you’re unsure about any steps, don’t hesitate to contact an electrician—it's better to be cautious than to risk a code violation or damage to your system. Safety and compliance are key when installing life-safety equipment.
Always disconnect power before wiring your emergency light or exit sign.
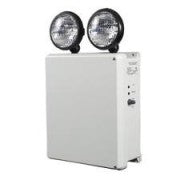
Mounting Procedure – Emergency Lights
Units typically mount with included brackets or pre-drilled screw holes. Depending on the model, you’ll secure the fixture first, then route and connect wiring through the back. Once installed, a housing cover conceals all internal connections.
 Most emergency lights are designed for universal mounting on walls or ceilings, with straightforward installation procedures. Begin by holding the fixture housing up to your desired mounting location and marking where the screws will go. If mounting to drywall, be sure to use the appropriate anchors to ensure a secure fit. Many models come with a snap-in mounting bracket that simplifies installation and allows for wiring to be completed before final placement. Route your wires through the knockout hole or rear access panel, connect according to the included wiring diagram, then secure the fixture and close the housing cover. Once the unit is fully installed and powered, check that the LED indicator light turns on—this signals that the battery is charging properly. Emergency lights should be positioned to cover all critical exit paths, doorways, or intersections, so be sure your placement maximizes visibility.
Mount securely using brackets or backplate screws included with your fixture.
Mounting Procedure – Exit Signs
Exit signs follow similar installation steps. Depending on the model, they may mount flat to the wall or hang from a bracket. As with emergency lights, connect to 120V or 277V AC only after turning off the power. Most models include NiCad battery backups that automatically power the sign during outages.
 Exit signs typically come with multiple mounting configurations to suit different installation needs. Surface-mounted signs can be installed directly to the wall above doorways, while others include canopy kits for top-mount or ceiling applications. Start by deciding which direction your chevrons (directional arrows) should face—most models include removable knockout arrows that you punch out before mounting. As with emergency lights, always cut power at the breaker and test-fit the sign to your chosen surface before securing any screws. When wiring, be mindful not to overtighten connections to the battery leads or transformer board. After installation, flip the power back on and press the test button to ensure the LEDs illuminate and the battery backup functions correctly. If your exit sign includes emergency lighting heads (combo models), aim them to light the egress route clearly. Clean installation not only looks professional but also ensures voltage and wattage requirements are properly met for code compliance.